
How to use the Weber Pizza Oven - Review & Demo
How to use the Weber Pizza Oven - Review & Demo
The Weber Charcoal Pizza Oven is the latest innovation from Weber, it makes perfect fresh authentic pizza time after time, also naan breads and pittas. The clever pizza oven cooks amazing pizza in less than 4 minutes once heated.
Great fun for children to create and watch their own pizza being cooked on the Weber Pizza Oven. Its been cleverly designed by Weber to fit on top of all 57cm Weber Charcoal barbecues. If you've already got a Weber 57cm barbecue this gadget is a must have accessory.
The Weber Pizza Oven is made from the same durable material as your charcoal barbecue - Porcelain-enamelled steel, a fantastic cordierite stone cooking surface and steel ring plus heat shield. It heats up so fast, much quicker than traditional wood fired ovens, quickly reaching 450 degrees centigrade with an even cooking temperature. This ensures it cooks the base and topping evenly to give a truly delicious traditional tasting pizza.
The Weber Charcoal Pizza oven is capable of cooking up to ten pizzas in an hour! When not in use its clever design allows for it to be stored under your existing weber kettle barbecue lid, neat hey!
It is also a lot cheaper than a standalone wood fired pizza oven and takes up considerably less space in your garden or patio!
Weber know that the key to a perfect pizza is cooking both the base and the topping evenly, and that the perfect pizza oven needs to deliver a high, constant, even temperature, top and bottom. The Weber Original Charcoal Pizza Oven does just that.
It's designed and developed here in the UK by a fantastic team of people, it truly is a great product.


Take a look at BBQs 2u 5 Star reviews from previous customers, as a family business passionate about Weber barbecues you can be assured your in the best possible hands throughout your purchase and after support.
Setting up the pizza oven couldn't be easier, it fits securely onto your 57cm Weber kettle barbecue, after lighting the briquettes as usual with a Chimney Starter. Pour the glowing briquettes on to the charcoal grate and leave a 3 inch gap at the front, add around 10 unlit briquettes to fill any gaps, it'll ensure you get the best from your pizza oven.
The team of chefs at the Weber Grill Academy have been busy perfecting a dough recipe that ensures you get an authentic light and crispy pizza base every time.
We wanted to demonstration how the Weber Barbecue Pizza Oven works, write a review and generally let everyone know how to use it. Plus pass on a few tips to help you get started and really make the most of your Weber Original Charcoal Pizza Oven. Take a look at our photo's taken along the way to making perfect pizza on your Weber barbecue.
Weber Products Used
Weber One Touch Original 57cm BBQ
Weber Charcoal Pizza Oven Bundle
Weber Pizza Paddle - Black
Weber Pizza Wheel - Black
Weber Firelighters
Weber Long Lasting Briquettes
Weber Chimney Starter
Weber Wood Chunks & Chips
Getting Started with your Weber Charcoal Pizza Oven!
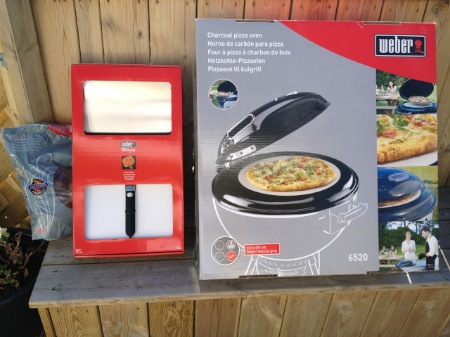


1. Light a full Weber Chimney Starter of briquettes and leave for 25mins-30mins.
2. Once the briquettes are ready (glowing with grey ash on top) pour them on to the charcoal grate spreading them out evenly. Make sure you leave a 3 inch gap at the front for good air flow.
3. Plug any gaps with about 10 extra briquettes or lump wood pieces.
4. Place the pizza oven directly onto the rim of the barbecue, with the opening facing you. Leave to preheat for 15 minutes.
Opening & Closing the Lid
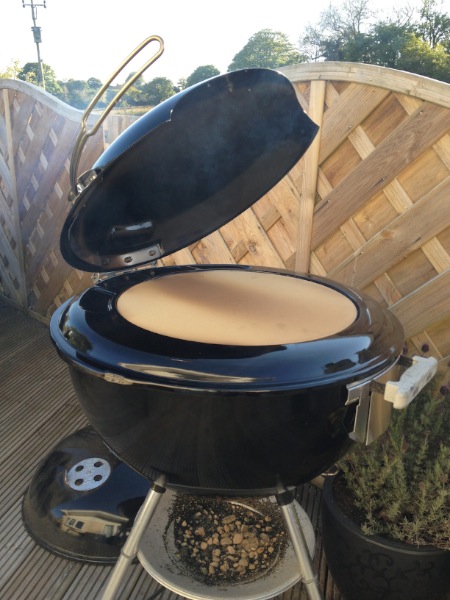
The lid has been carefully designed with a safety feature that lets you secure it open. There is a knack to opening and closing the lid but once you've done it a few times it becomes second nature.
TO OPEN: Pull the handle out to the side and lift, you'll feel it click into place.
TO CLOSE: Lift the handle slightly, nudge to the right and lower. Try it a few times whilst the oven's cold until you get the hang of it.
Play with Wood Chips
The oven is designed with slots at the back to let the heat flow over the top of the pizza, but also to let you experiment with flavours by adding a few pre-soaked Weber wood chips. You'll find that the smoke becomes an ingredient flavouring the pizza or bread and helping you discover your own perfect and unique creations.
Weber Pizza Dough - Why use the 50/50 flour mixture?

STRONG FLOUR which is milled from hard wheat varieties has high protein and gluten content. It has more elasticity and will give you a spongy more bread like pizza base.
TIPO 00 PASTA FLOUR is essentially a super refined plain flour, graded differently because of its low gluten and protein attributes.
The effect of mixing the two types gives us an incredibly light and crisp base full of air pockets with a fabulously pleasing authentic crust.
50/50 Weber Pizza Dough Recipe - Makes 5 9" Pizzas

300g, strong white bread flour
300g, Tipo 00 flour (or plain white flour if you cant find Tipo 00 flour)
1 sachet (7g) of instant dried yeast
3 tbsp extra virgin olive oil
2 tsp caster sugar
2 tsp salt
375ml warm water
Weber Pizza Sauce Recipe

Tinned tomato, chopped
2 tsp oregano, dried
1 tsp sugar
Good glug of olive oil
Salt & Pepper to taste.
Weber Pizza Toppings

Remember that for a great pizza it really is true that less is more. Don't overload the pizza with deep toppings or it will cook unevenly. As a rule of thumb we would suggest never using more than three flavour combinations.
Throughout our demo on various pizzas we used mozzarella, parma ham, pepperoni and pineapples.
10 Steps to Weber Pizza success every time!


1. DOUGH METHOD: Place all the flour in a large mixing bowl. Add the yeast sachet, salt, sugar and oil. Then add the warm water and mix with a wooden spoon until all combined. Turn out onto a floured surface and knead for at least 10 minutes. Add extra tipo 00 flour if the dough is too sticky. The finished dough should be silky, smooth and springy. Allow the rise in a warm place for 1 hour or until it has doubled in size. If you are making the dough the night before allow it to prove in the fridge. This slows the process down.

2. After the dough has risen knock it back and divide into five small balls (around 180g). To make a dough ball, push the dough through your thumb and middle finger, tucking all the edges inside itself so there are no visible folds or seams on the outside of the dough ball. This will make a round pizza.

3. SAUCE METHOD: In a bowl mix together the chopped tomatoes, salt, pepper, oregano, sugar and oil.

4. ROLLING OUT METHOD: Roll out your base with plenty of flour. Roll one way then turn it over and roll the opposite way, this keeps it circular. Remember the thinner the better. A thick pizza won't cook as evenly or as well as a thin one.

5. Before you add the sauce make sure your base has plenty of flour under it and moves freely. Add a little sauce with a silicone basting brush taking care not to spill any. Leave a centimetre edge for the pizza crust to rise.

6. Add your toppings quickly - leaving a pizza too long will make it soggy and stick.

7. THE PADDLE: Keep your paddle dry and well-floured at all times. Line your paddle up behind the pizza flush to the work surface. Slide the paddle under the base firmly and with confidence before transferring to the Weber Pizza Oven.

8. THE COOKING: Sprinkle cornmeal or flour onto the pizza stone - Cook your pizza for around 3-4 minutes, rotate 180 degrees and and cook as required to ensure it cooks evenly.

9. Allow 2 minutes in-between pizzas. This helps the Weber Pizza Oven get back up to temperature.

10. Always remember, pizza is very hot when straight out of the oven, so take care and enjoy!
We hope you enjoyed this guide on how to use your Weber Pizza Oven as much as we did making it!
Share this content




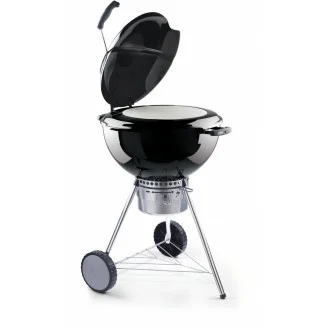 View Weber Charcoal Pizza Oven
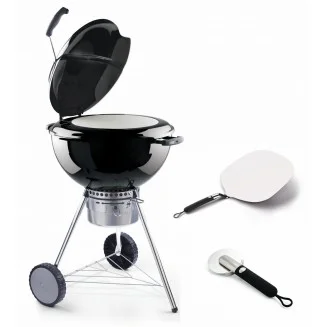 View Weber Charcoal Pizza Oven Bundle