Weber BBQ - Hints & Cooking Tips
Weber BBQ - Hints And Tips
Weber barbecues are special – very special!
Unlike many other barbecues, ours love it with the lid on! That’s how you get the fantastic, unique Weber taste. And because you barbecue with the lid on, you can experience, for the first time, a whole range of foods that you didn’t even know you could cook on a barbecue!

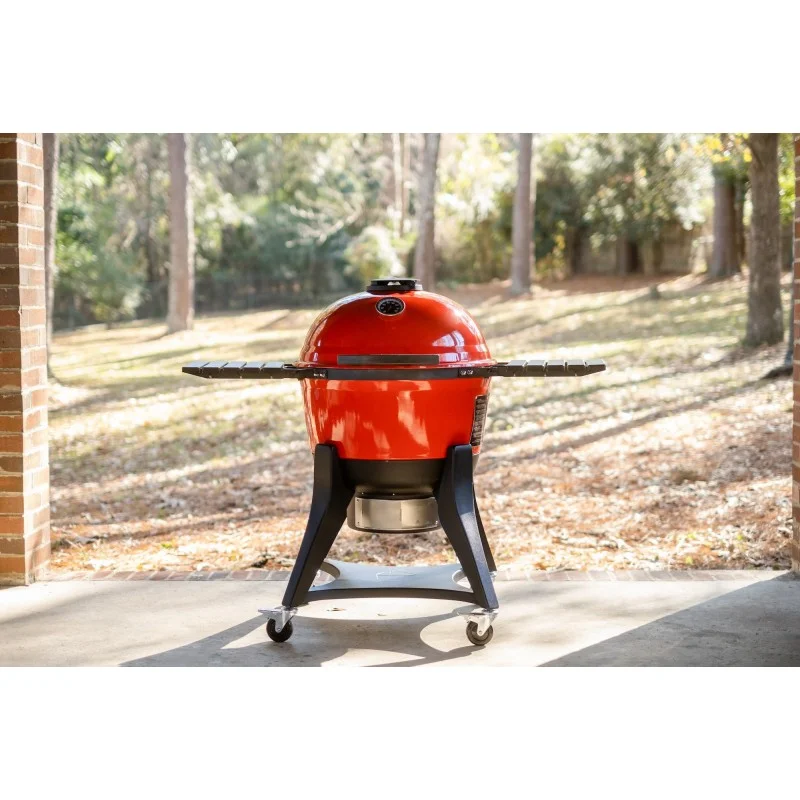
There is however a new kid on the block... The Kamado Joe - Kettle Joe this a new bbq for 2021 bbq has all the benefits of the traditional kettle bbq but with the some of advantages of the more expensive ceramic Kamado bbq. Take a look, all the Weber 57cm accessories should be compatible with it. The Kettle Joe is a true game changer, we prefer it over the Weber Mastertouch and other Weber Kettles.

Live life to the full
Whatever the weather! Barbecue in the winter. Barbecue in rain and snow. Barbecue whenever and wherever you want with Weber. Weber barbecues are for life. They’re durable, practical and fun – all year round. Manufactured and tested in Chicago, they’re built to handle extreme conditions, giving you no excuse to put something on the barbecue right now!
Obviously, wind can cause problems though. So, to maintain the required temperature inside the barbecue, place it in a sheltered spot – but not inside! In the winter all you’ll need is a few more Weber Briquettes to keep the temperature at its optimum. So remember to store the briquettes somewhere dry and buy a good stock so you can indulge yourself whenever the mood takes you.
Light your barbecue well in advance. In colder weather the briquettes take slightly longer to heat up. Place the ignited briquettes in the barbecue, remember to open all the vents fully, put in your food, close the lid and off you go. All you need to do now is keep yourself warm round the Weber Fireplace and bingo! Barbecues have never been this much fun!

Cooking Techniques
One simple rule, keep a lid on it!! Always cook with the lid down and with the vents open. This will allow you to control the temperature more effectively, avoid flare-ups and keep food moist.
With a Weber® barbecue you can cook just about anything from whole chickens to cakes and breads! Try out the different barbecuing techniques – you’ll be amazed how easy they are!
Get yourself started with by checking out our recipe section and using the guidelines within our simple and easy to use cooking instructions

Always open the air vents
Make sure that the top and bottom air vents are open at all times during cooking. The only time you need to touch the air vents is to extinguish the briquettes after you’ve finished barbecuing.
With a Weber barbecue fresh air needs to flow constantly through the closed barbecue. For this reason, you should never raise the lid to lower the temperature. If you want less heat in the barbecue, do not touch the lid or the air vents – simply use less briquettes. This is the only method that works. And part of the charm of using briquettes is learning how to control the temperature and master the perfect barbecuing technique.

Chimney Starter
To use a Weber Chimney Starter remove the cooking grate from your charcoal barbecue and place the chimney starter onto the charcoal grate.
Fill the chimney starter with Weber® briquettes and place 2 Weber Lighter Cubes onto the charcoal grate underneath the wire rack of the chimney starter.
Light the firestarters, these will stay alight for around 10 - 15 mins.
The way the Weber Chimney starter works is that it sucks the hot air up from the bottom and makes it circulate through the briquettes. The chimney starter will continue to do this after the firestarters have gone out and should be ready within 20-30 mins. Please note that 20-30 mins is just a guideline and this can be affected either way due to weather conditions, outside temperatures and how dry your charcoal has been stored. When the briquettes at the top of the chimney starter are lightly coated with white ash you are ready to go.
Empty the briquettes onto the charcoal grate where desired. For more information about where to position your briquettes see cooking techniques within this section.
For safety, always wear insulated barbecue mitts when doing this. Never place a chimney starter on the grass or a wooden deck and be sure to put it on a heatproof surface away from children and pets.
For an in depth look at how to do this please see this Weber Chimney Starter Video

Use a thermometer
Whether you choose a Weber standard cooking thermometer or one of our electronic models, it will help you cook your food to perfection every time. If you choose a wireless food thermometer, you can even sit indoors and wait while your meat cooks outdoors - a real advantage if you are barbecuing in the winter.
TAKE THE GUESSWORK OUT OF BARBECUING
Master the art of a medium-rare steak and become the culinary genius you aspire to be - no training necessary.
The key to grilling perfect meat is the core temperature, take a look at our range of Weber BBQ Thermometers.
The Weber iGrill digital Bluetooth thermometers monitors the internal temperature of food from beginning to end, and will notify you once it has reached the perfect degree to serve.
Simply download the Weber® free iGrill app on your mobile device and sync it to your bbq.

Gas vs Charcoal
Charcoal fans will say that you can’t beat the taste of food cooked on a charcoal barbecue. They generally start at a lower price point and can offer an initial investment saving. With a charcoal barbecue all you need is a bag of briquettes and a light, and you're all set to cook up a feast.
Barbecue enthusiasts who choose gas over charcoal often do so for the added control it gives them – the heat is more uniformed and can be totally controlled by the user on a weber gas bbq. One touch of a button and your barbecue is fired up and ready to go. The added benefit that Weber’s gas grills have is that they’re fitted with Flavorizer® bars, which ensures you still get the real barbecue flavour from vaporising those fats and juices on the bars. Take at the Weber Genesis II BBQs new for 2017 featuring the GS4 High Performance Grilling System.
If you’re not biased either way, why not try out an electric barbecue? They’re ideal for new barbecuers who only have a small balcony or terrace, but still want that true barbecue taste.

Drip trays are a must
When using your Weber to roast food, make sure you place a drip tray on the charcoal grate beneath the food. This will protect your barbecue from fat and juices that might otherwise become baked on. It’s also a good idea to place some liquid in the bottom of the drip tray, otherwise fat and juices can bake on the surface and give the food an unpleasant taste. In addition, you can pour stock into the drip tray along with vegetables and herbs - when mixed with the meat juices, this provides the base for the perfect gravy.

What about Briquettes?
Good food deserves good fuel. Always use quality Weber Briquettes and charcoal, which are of the finest quality, to get the best results. Ready to grill in 35 minutes and a total of 240 minutes of grilling with Weber Long Lasting Premium Briquettes - the perfect choice for your barbecue party.
Briquettes are more popular than lump charcoal. Some are pre-soaked in lighter fluid so they start easier but this can leave a chemical taste to your food. Lump wood if used produces a higher heat than briquettes but produces heat for a lower length of time. Weber® long lasting briquettes produce an even heat for up to 4 hours. To ensure correct lighting of your briquettes please see Weber® Chimney Starter within this section.

Cleaning your barbecue
Clean your charcoal grill after you have put the hot coals into the barbecue and place the cooking grate and lid on top. After 10 minutes, any fat or food will have carbonised allowing you to brush clean the carbonised residue.
Clean your gas grill before cooking. Turn all of the burners on high and leave for 10 minutes. After 10 minutes, any fat or food will have carbonised allowing you to brush clean the carbonised residue.
For an in depth look at how to do this please see videos for Charcoal / Gas
Share this content


